
Choosing the right packaging is one of the most important decisions in the life cycle of a product. Among a plethora of options at our disposal, the stand-up pouch has gained category dominance in many different industries because of its effectiveness, shelf space, and ease of use by the consumer. But its effectiveness depends upon an underlying decision: its size. Proper pouch size is not simply a question of aesthetics, but rather of product preservation, cost management along the supply chain, and the overall experience your brand gives the end user. A pouch that is either too big or too small may result in product integrity, high shipping rates, and poor consumer attitude.
It is an ultimate guide to brands, product managers, and operations teams. We will go beyond mere estimations and present a systematic way of deciding on the exact size of the pouch that best fits your application. In this case, you will get the data, tools, and strategic insight you need to make an informed and optimal decision.
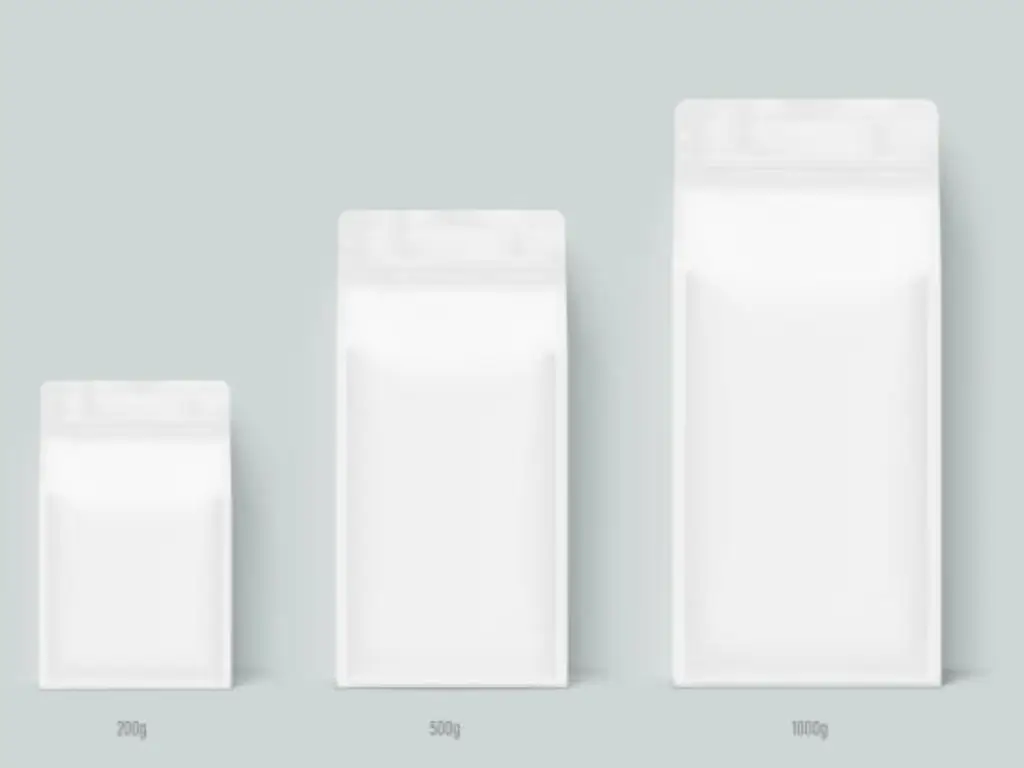
Our Comprehensive Stand Up Pouch Size & Volume Charts
The main purpose of a size chart is to give you a good starting point when mapping out your selection. Due to the huge variety of product types, we have created a series of specific charts that relate standard pouch dimensions to estimated capacities for specific product categories.
It is important to note that all volumes and weights are approximate in nature. Although they are based on common product densities within each class, there is natural variation to be expected. These charts are merely meant for rough guidance that needs to be followed by empirical testing with your specific product. All dimensions are given in the industry standard format of Width x Height x Bottom Gusset.
Chart 1: Liquid Products — Estimated Volume
| Dimensions (in) | Dimensions (mm) | Approx. Volume (fl oz) | Approx. Volume (mL) |
| 3.125 × 5.125 × 2 | 79 × 130 × 51 | 2 fl oz | 59 mL |
| 4 × 6 × 2.5 | 102 × 152 × 64 | 4 fl oz | 118 mL |
| 5 × 8 × 3 | 127 × 203 × 76 | 8 fl oz | 237 mL |
| 6 × 9 × 3.5 | 152 × 229 × 89 | 16 fl oz | 473 mL |
| 7 × 11.5 × 4 | 178 × 292 × 102 | 28 fl oz | 828 mL |
| 8 × 12 × 4.5 | 203 × 305 × 114 | 32 fl oz | 946 mL |
Chart 2: Powdered Products — Estimated Weight
| Dimensions (in) | Dimensions (mm) | Approx. Weight (oz) | Approx. Weight (g) |
| 4 × 6 × 2.5 | 102 × 152 × 64 | 2 – 3 oz | 57 – 85 g |
| 5 × 8 × 3 | 127 × 203 × 76 | 5 – 7 oz | 142 – 198 g |
| 6 × 9 × 3.5 | 152 × 229 × 89 | 10 – 12 oz | 283 – 340 g |
| 7 × 11.5 × 4 | 178 × 292 × 102 | 16 – 20 oz | 454 – 567 g |
| 8 × 12 × 4.5 | 203 × 305 × 114 | 22 – 26 oz | 624 – 737 g |
Chart 3: Granular or Whole Products — Estimated Weight
(e.g. whole coffee beans, granola, pet treats, nuts)
| Dimensions (in) | Dimensions (mm) | Approx. Weight (oz) | Approx. Weight (g) |
| 4 × 6 × 2.5 | 102 × 152 × 64 | 1 – 2 oz | 28 – 57 g |
| 5 × 8 × 3 | 127 × 203 × 76 | 3 – 5 oz | 85 – 142 g |
| 6 × 9 × 3.5 | 152 × 229 × 89 | 8 – 10 oz | 227 – 283 g |
| 7 × 11.5 × 4 | 178 × 292 × 102 | 12 – 16 oz | 340 – 454 g |
| 8 × 12 × 4.5 | 203 × 305 × 114 | 18 – 22 oz | 510 – 624 g |
How to Correctly Measure a Stand Up Pouch
So, to use the charts above and to get your specifications right, you need to know the standard way to measure a stand-up pouch. Three important dimensions are Width, Height, and Bottom Gusset.
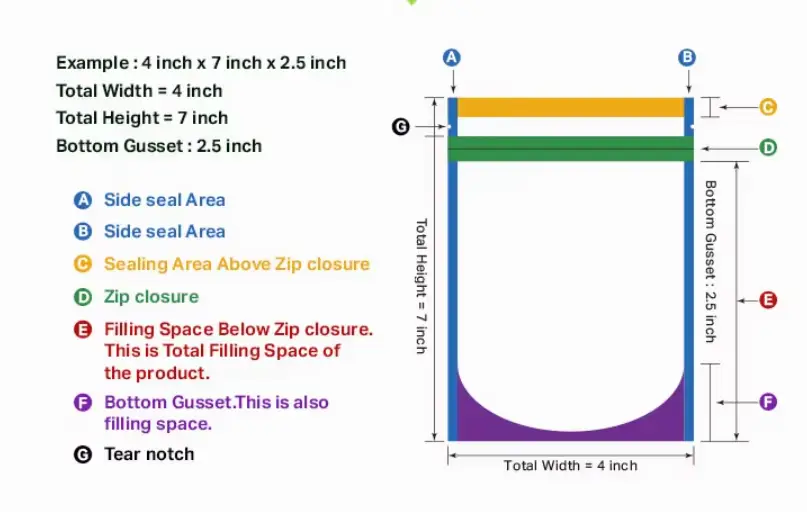
- ● Width (W): This is the distance from the left side edge to the right side edge of the pouch in its flat layout. The measurement should be from outside seal to outside seal.
- ● Height (H): This is the measurement from the absolute lower lip of the pouch to the absolute upper lip of the pouch. It should be noted that this is the total external height, not the usable or fillable height, normally reduced because of the placement of the tear notch and zipper.
- ● Bottom Gusset (BG): This dimension is the most confusing one. The gusset is the folded material at the bottom of the pouch, which allows it to stand. The true measurement is the total width of the gusset as opened and stretched. For instance, a 3″ gusset means that the base of the pouch (when standing) will be 3″ deep.
These three external dimensions are the industry standard basis for ordering and manufacturing flexible packaging.
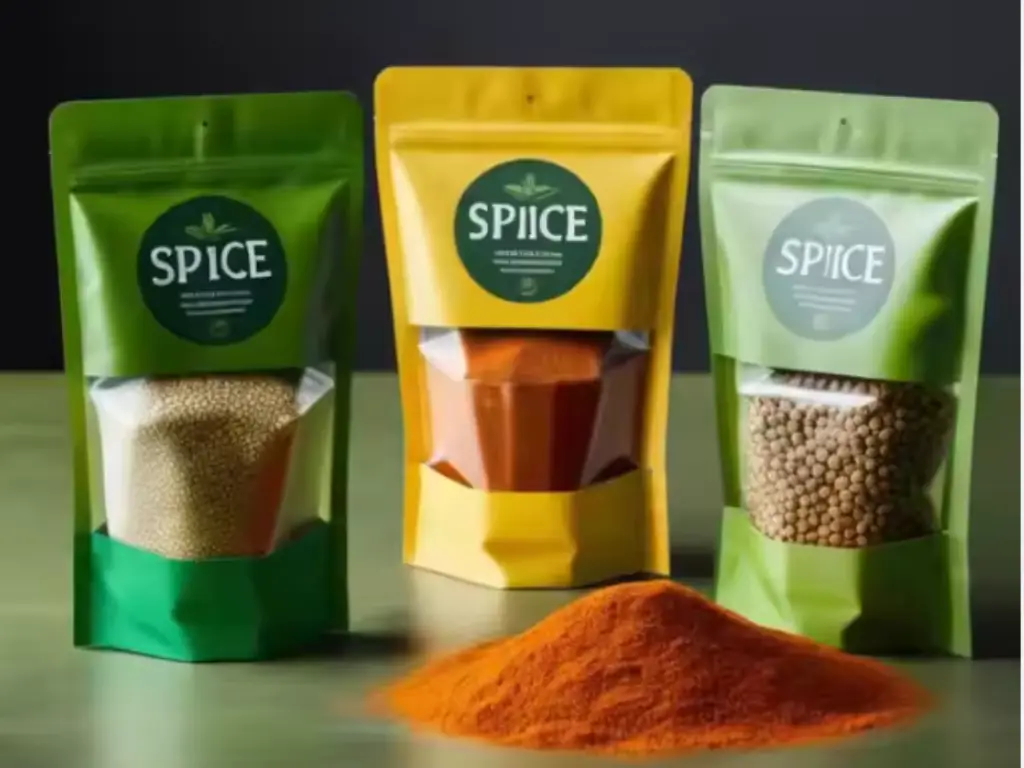
Why Your Product’s Density Is the Deciding Factor
The density of your product is one of the most important factors for selecting the right pouch size, and can often be the difference between a perfect fit and costly mistakes. One of the most common problems with stand-up pouches is the misalignment of weight and volume. While weight is easy to measure, it is the bulk density (the mass of the product per unit volume) of a product that really determines the amount of space the product will take up. For example, 8 ounces of ground coffee, because the coffee particles are small, takes up much less space than 8 ounces of whole bean coffee, which has irregular shapes and air spaces. Using the same pouch for both can lead to sealing problems or overflow. This is not only true for coffee; other products such as protein powder and granola, sugar and popcorn, pet kibble and freeze-dried snacks also have their own density gap. Even though these products have the same weight, they may require very different pouch volumes. That’s why bag size charts are only a starting point, and the most accurate sizing method is to test your product in the pouch. This will prevent improper pouch filling, which can result in overfilled or underfilled pouches, which not only affect packaging efficiency, but also shelf presentation and consumer perception. Accurate sizing means faster packaging, lower material costs, and a cleaner, more professional brand image.
Beyond Dimensions: Considering Shelf Appeal and User Experience
The correct stand-up pouch size is not just a technical decision; it is directly linked to the way your product is perceived on the shelf and how people interact with it. A properly sized pouch maximizes perceived quality and usability.
Shelf Presence: Fill Ratio Drives First Impressions
The pouch fill ratio (the proportion of internal pouch space actually occupied by product) is an important determinant of pouch appeal on the shelf.
- ● Underfilled Pouch: A pouch that is too large will often look slack and flimsy on the shelf. This may signal to the consumer that the product is of poor quality and may prevent the pouch from standing upright and stable, thus rendering the pouch’s main structural advantage useless.
- ● Overfilled Pouch: A pouch that is filled to its maximum capacity can look strained and bloated. This places stress on the seals, can round out and make the bottom gusset unstable, and can create a difficult and unappealing shape for the customer.
The optimum size allows the product to fill the pouch to the extent that a tight and stable structure is formed. This makes the front panel an effective “billboard” for branding, showing the consumer a flat, professional face.
User Experience: Sizing Impacts Daily Use
A pouch needs to not only look good but also function well in real-life applications.
- ● Accessibility: The pouch opening must be sized appropriately to allow its contents to be accessible. Is it easy for a consumer to place a standard measuring scoop? Can they easily get to the last parts of the product? A pouch that is too tall and too narrow can be a source of functional frustration.
- ● Resealing Integrity: Product fill level must end well below the zipper track. If product particulates get trapped in the resealing mechanism, it will not close properly, which will compromise product freshness and undermine a big selling point of the packaging.
- ● In-Use Stability: A pouch with a well-proportioned gusset will stay put on a consumer’s countertop even when the contents are empty. A pouch that is top-heavy or unbalanced and tips easily is a negative and memorable inconvenience.
Quick Reference: Fill Ratio vs. Pouch Appearance
| Fill Ratio Status | Visual Impact | Potential Issues | Recommendation |
| Too Low (<70%) | Slack, underfilled, may not stand properly | Perceived as low value, weak shelf impact | Reduce pouch size or increase fill |
| Optimal (75–90%) | Firm and upright, clean branding face | Balanced appearance, strong shelf presence | Ideal range for form and function |
| Too Full (≥95%) | Bulging sides, rounded bottom | Seal strain, reseal issues, hard to handle | Size up slightly, leave ≥2cm above fill |
✅ Pro Tip: Always leave at least 1.5–2cm of headspace above the product to allow clean sealing and easy resealing.
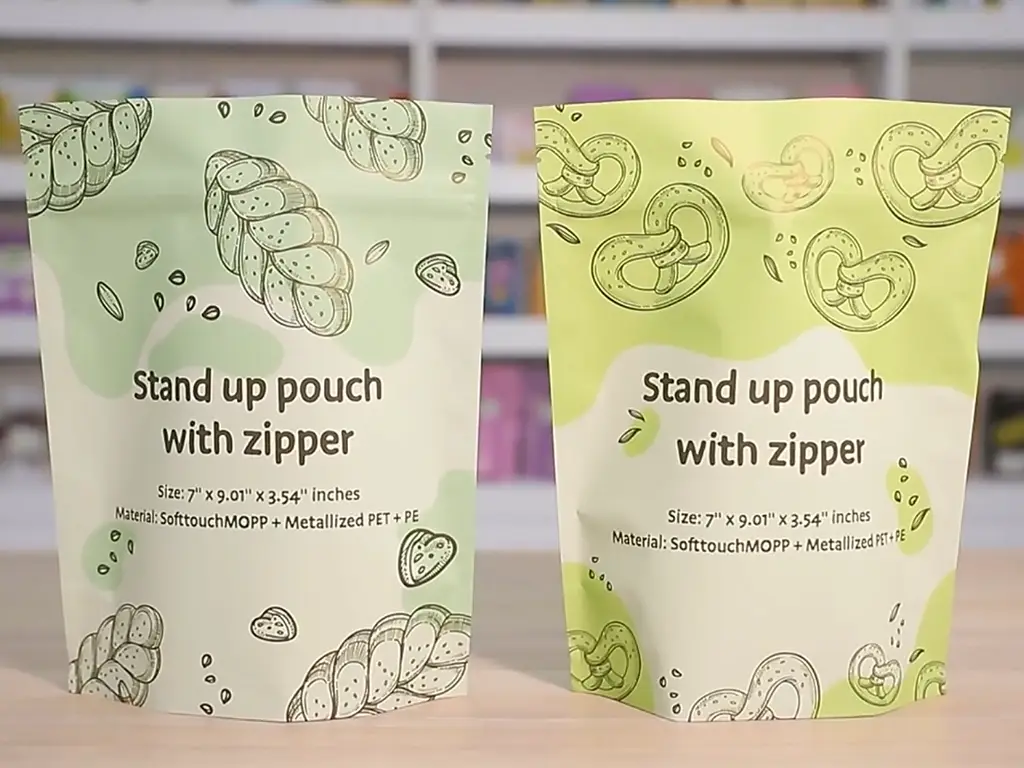
How Pouch Material Affects Your Final Size Choice
When selecting a pouch, the material structure has a slight effect on the internal capacity, even if the outer dimensions are the same. While material selection is generally driven by barrier requirements (e.g., oxygen, moisture, light), it also has an effect on the pouch performance once filled.

Different materials have different thickness, stiffness, and flexibility. A pouch made from a stiff multi-layer laminate (such as foil or kraft paper) is much less likely to collapse. This stiffness, however, restricts the amount of flexing and conforming of the pouch to its contents. As a consequence, the usable internal volume may be somewhat less than that of a pouch constructed from thinner, more flexible materials such as polyethylene (PE) or BOPP.
Even the folding and expansion of the bottom gusset can be adjusted according to the rigidity of the material. For highly compressible or irregularly shaped products, this difference may be insignificant. But for high-fill applications or products where a tight fit is required, the material’s physical behavior can swing the balance between a perfect and problematic fill.
In short, a soft PE pouch 6″x9″x3″ may hold more product than the same size in kraft-foil, simply because of the way the walls and gusset bend under pressure.
This is an important detail that is often taken for granted when working at the capacity margins. Always test on the final material structure—what works in a sample made of soft laminate may not behave the same in your chosen production-grade film.
7 Common Sizing Mistakes and How to Avoid Them
Pouch sizing has a few potential pitfalls. The following table summarizes the most common errors with clear and actionable solutions to avoid them.
| The Mistake | The Consequence | The Solution / Best Practice |
| 1. Ignoring Fillable Space | Ordering a pouch that is too small because the capacity was calculated based on the total external height. | Identify the zipper line and tear notch. Measure from the inside bottom of the gusset to just below the zipper to determine the true fillable height. |
| 2. Forgetting Headspace | The product is filled too high, preventing a clean, strong heat seal and potentially contaminating the seal area. | Designate a non-negotiable headspace of 1 to 1.5 inches (25-38mm) between the product fill line and the top edge of the pouch. |
| 3. Disregarding Product Settling | A pouch sized for “fluffy” product appears underfilled and slack on the shelf after settling during transit. | After a test fill, manually agitate or tap the pouch to simulate settling. Verify that the post-settling appearance is still acceptable. |
| 4. Confusing Fluid Oz with Weight Oz | Sizing a dry product (sold by weight) using a chart based on fluid ounces (a measure of volume). | For dry goods, rely exclusively on weight-based charts (oz/g). For liquids, use volume-based charts (fl oz/mL). Never interchange them. |
| 5. Selecting an Inadequate Gusset | The filled pouch is unstable and tips over easily because the base is too narrow to support the height and weight. | As a general rule, ensure the gusset depth is at least one-third of the pouch height for good stability. Test this with filled samples. |
| 6. Overlooking Feature Placement | A one-way degassing valve or hang hole is placed in a location that does not interfere with branding or sealing. | Always request a technical dieline (a flat schematic) from your supplier before ordering to confirm the exact placement of all features. |
| 7. Skipping the Sample Test | Committing to a large production order based solely on theoretical data from a chart. | This is the most critical error. The solution is to adhere to the final, non-negotiable rule of packaging procurement. |
The Golden Rule: Always Test With Samples First
No chart, calculator, or expert opinion can replace the certainty of physical testing. Sampling and testing are not optional procedures; it is a mandatory, risk-reducing process as part of any professional packaging purchasing program.
Sample testing is a kind of project insurance. The small investment in time and shipping costs is minor compared with the financial and reputational loss of an entire production run of mis-sized packaging. This step is the final cross-check between theory and reality.
A good testing procedure includes:
- ● 1. Obtaining samples of the 2-3 most promising sizes found in your research
- ● 2. Filling each sample to its target fill weight with your actual product
- ● 3. Sealing of pouch, preferably using equipment that closely mimics your production environment.
- ● 4. Critically assess the sealed package for stability, shelf appearance, seal integrity, and overall performance.
- ● 5. Performing a transit simulation of the packaging to the extent possible, shaking or dropping the package so it can withstand the rough and tumble conditions of the supply chain.
From Sizing Specification to Production: Your Strategic Next Steps
The first step is to know the pouch dimensions. The next challenge is to translate this technical knowledge into a physical package that is sufficiently marketable while avoiding unnecessary risk or delay. Baishen Pack is designed to answer these exact post-specification problems.
To give you absolute certainty and negate sizing risk, we first develop custom prototype samples that can be fully physically validated with your product before it goes into mass production. Our cutting-edge digital printing technology then powers your go-to-market strategy, enabling ultra-low Minimum Order Quantities (MOQs) with a fast seven- to ten-day manufacturing turnaround. That means you can bring new products to market, test markets, and react to opportunities with unprecedented agility and at a low capital cost. Throughout this process, our custom packaging engineers serve as your consultants to make sure your final package is not only the right size but is fully engineered to perform and look its best on the store shelves.
Contact our technical specialists today to start a consultation, obtain a custom validation prototype, or get a detailed quotation for your project. Work with Baishen Pack to produce with confidence and speed.