What Food Packaging Design Must Decide Before Artwork
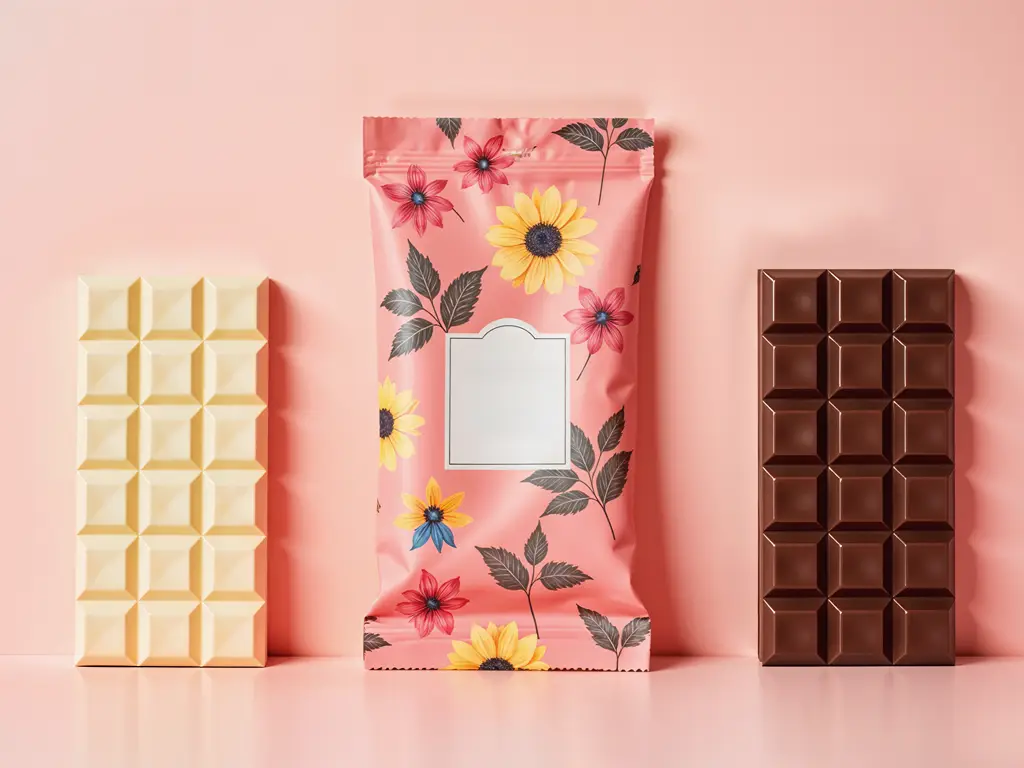
Food packaging design has to protect the product, communicate the brand, meet the rules of each sales market, and run on the selected filling and printing process. Color, typography, illustration, and layout matter, but they sit on top of decisions about pouch format, material structure, sealing, print route, and supplier controls.
A dieline is therefore more than a drawing template. It defines where the seals, gussets, zipper, tear notch, spout, and artwork panels meet. If the structure or filling method changes after artwork approval, the usable print area may change with it. Resolving the physical package first reduces redesigns, proofing rounds, and launch delays.
The practical sequence is simple: define the product and shelf-life target, choose a pouch format, specify the required barrier and sealant layers, select a print route for the quantity and SKU count, and then release production artwork. Each decision gives the next one a boundary.
Food Pouch Packaging Design: Build the Brief Before the Dieline
A practical packaging design food brands can manufacture begins with a written product brief. It does not need to be long, but it must give the designer and converter the same operating assumptions. Record the product form, fill temperature, target shelf life, pack weight, sales region, distribution conditions, filling method, planned order quantity, and number of SKUs.
Product behavior comes first. Oils can attack some seal layers; powders can contaminate the seal area; sharp pieces can puncture thin films; coffee releases gas; frozen products need films that remain flexible at low temperature. A food product packaging design should turn those risks into measurable requirements such as oxygen and moisture barrier, puncture resistance, seal strength, light protection, or a one-way valve.
Next, map information to the physical panels. Reserve the front for the brand, product name, variant, and the few claims that help shoppers decide. Put ingredients, nutrition information, allergens, net quantity, preparation or storage instructions, and traceability fields where they remain readable after the pouch is formed. Keep critical copy away from seals, zippers, tear notches, gusset folds, and spout welds.
The Production Brief Your Designer and Converter Need
| Brief Input | Why It Matters | Decision It Controls |
|---|---|---|
| Product form and sensitivity | Shows whether oxygen, moisture, aroma, light, oil, or puncture is the main risk | Film structure and barrier level |
| Fill weight and pack dimensions | Determines volume, headspace, panel proportions, and shelf stability | Pouch size, gusset, and seal width |
| Filling and sealing method | Manual filling, co-packing, and automated lines impose different tolerances | Format, zipper position, roll direction, and sealant |
| Sales market and claims | Controls mandatory copy, language, symbols, and substantiation | Information hierarchy and compliance review |
| Quantity and SKU count | Determines whether setup cost or unit cost dominates the budget | Digital, flexographic, or gravure printing |
Pouch Types: Matching the Format to Your Product
Format is where design stops being abstract. Every pouch type is a mechanical answer to a question about your product: Is it dry or liquid? Does it need to stand on a shelf? How fragile is it? Pick the wrong format and no amount of beautiful artwork fixes it.
Stand-Up Pouches: The Default for Shelf-Ready Food
The stand-up pouch dominates food aisles for a mechanical reason: a shaped bottom gusset lets an empty bag stand upright, so the shelf does the advertising. It suits dry snacks, coffee, spices, powdered supplements, and granola, which covers nearly every small food brand’s first product. Typical constructions run around 100 microns in laminates like MOPP/VMPET/PE, with a resealable zipper set 30–35 mm from the top and a tear notch above it. If you are unsure where to start, start here and rule it out deliberately.
Flat Pouches: The Lowest-Cost Format for Small Servings
A flat pouch (three-side seal) is the simplest bag in the family: no gusset, no stand, minimal material. That makes it the natural home for single-serve portions, sample sizes, seasoning packets, and tea. It costs less per unit and ships flat. The trade is shelf presence: it lies down or hangs, so plan for a hanging hole if retail display matters.
Spout Pouches: For Liquids That Pour
Once your product pours (beverages, liquid supplements, sauces, baby food), the spout pouch earns its extra cost. The spout replaces the guesswork of cutting a pouch open, and the cap reseals for multi-serve use. Spout placement (corner or center) and even fully shaped pouch bodies are all configurable. Budget more per unit than a stand-up pouch; you are paying for the mold and the cap.
High-Barrier Bags: When Shelf Life Is the Product
Mylar-style high-barrier bags wrap sensitive contents in metallic or metalized layers that block light and oxygen. Coffee, dehydrated meals, and supplement capsules live or die by shelf life, so the barrier acts as the product’s insurance policy. Many of these run around 120 microns in structures like MOPP/VMPET/PE, with child-resistant zipper options where compliance requires them.
Kraft Paper Pouches: The Sustainability Play and Its Limits
Kraft paper pouches signal natural and handmade, and bakery, granola, and organic brands use them for exactly that association. The honest caveat: paper alone is a poor barrier. Real kraft pouches are paper laminated to a functional film layer inside. If your product is oily, moist, or aromatic, ask the converter what the inner layer is before you commit. The paper outside tells you nothing about the protection inside.
Roll Stock Film: Design for the Filling Line
Roll stock is packaging before it becomes a bag: printed laminate supplied on 3- or 6-inch cores, formed, filled, and sealed on an automated line. You only choose this if you (or your co-packer) run filling equipment. The design constraints differ too: winding direction and outer diameter must match the machine, and the artwork has to survive high-speed forming. For brand owners scaling into co-manufacturing, this is the format that matters.
Pouch Types at a Glance
| Format | Suits | Shelf Presence | Watch Out For |
|---|---|---|---|
| Stand-up pouch | Dry food, coffee, powders | Stands upright, strongest retail presence | Slightly costlier than flat |
| Flat pouch (3-side seal) | Single-serves, samples, tea | Lies flat or hangs | No stand; add hang hole for display |
| Spout pouch | Liquids, sauces, liquid supplements | Stands; spout is the shelf differentiator | Highest per-unit cost in the family |
| High-barrier (Mylar-style) | Coffee, supplements, dehydrated food | Premium light-block look | Overkill for sturdy dry goods |
| Kraft paper pouch | Bakery, granola, natural positioning | Natural, tactile look | Barrier depends entirely on inner film |
| Roll stock film | Automated filling lines | N/A (formed by machine) | Needs filling equipment and machine-matched specs |
Features Follow the Product
Closure and feature choices are downstream of the same logic. Zippers suit multi-serve products. One-way valves vent coffee’s CO2 without letting oxygen in. Transparent windows sell visually appealing contents and expose unappealing ones. Hang holes convert flat formats into display formats. Child-resistant zippers are a requirement, not an option, for categories like certain supplements. Choose features by usage scenario, not by the feature list’s length.
Material Structures: What Your Product Actually Needs
Once the format is set, the real engineering question begins. “Food-grade” is the entry ticket, not the specification. Within food-safe materials there is a wide range of structures. The right one is decided by what your food does to its packaging over six months on a shelf.
Three Layers, Three Jobs
Almost every flexible food package is a laminate: multiple film layers bonded together, each with a job. The inner layer is the sealant: PE or CPP films that heat-seal cleanly and touch the food. The middle layer is the barrier: aluminum foil, VMPET (metalized PET), or PET, which blocks light, oxygen, and moisture to different degrees. The outer layer is the print surface: PET, PA (nylon), or MOPP, chosen for stiffness and print quality. A structure written as PET/AL/PE is a recipe read outside-in: print layer, barrier, sealant. When a supplier proposes a structure, ask what each layer is doing. “It’s a three-layer laminate” is not an answer until you know which layer is the barrier.
Match the Barrier to the Food, Not to the Budget
The most common material mistake is buying barrier strength by price instead of by symptom. Each food fails differently. Fatty foods such as nuts, chips, and jerky fail by oxidation, so they need an oxygen barrier, ideally with a metalized or foil layer. Dry goods like crackers and powders fail by moisture pickup, so the moisture barrier matters most, or the product goes soft and stale. Aromatic products like coffee and spices lose their identity when volatiles escape, which calls for a high barrier plus, for coffee, a one-way degassing valve. Light-sensitive products, including spices and some vitamins, need opaque or metalized layers, because light degrades them even in a sealed bag. The structure follows the failure mode. A cheaper structure that lets your product stale in three months is the most expensive option on the menu.
The Compliance Line and the Recycling Question
Two framework facts anchor the regulatory side. In the EU, Regulation (EC) No 1935/2004 on food-contact materials requires materials not to transfer constituents to food in quantities that could endanger health. In the US, the FDA’s general provisions for indirect food additives appear in 21 CFR Part 174. You do not need to become a regulator, but you do need a supplier that can provide a food-contact declaration for the exact materials in your structure. On the sustainability side, mono-material recyclable structures, including all-PE constructions, are increasingly available, although the attainable barrier and local collection route must still be checked. Compare the conventional and recyclable options against the same shelf-life and distribution tests.
Structure Selection Matrix: Product Type × Structure × Failure Boundary
| Product Type | Structure Direction | Failure Boundary (What Goes Wrong If You Under-Spec) |
|---|---|---|
| Fatty snacks (nuts, jerky, chips) | Oxygen-barrier laminate with metalized or foil middle layer | Rancid odor and off-flavors within weeks; returns and review damage |
| Dry goods (crackers, powders, bakery) | Moisture-barrier laminate, e.g. PET/VMPET/PE family | Product goes soft or clumps; texture complaints before expiry |
| Coffee (whole bean or ground) | High-barrier layer + one-way valve, light-block exterior | Aromatics escape and CO2 balloons the bag without a valve |
| Liquids (beverages, sauces, liquid supplements) | Robust sealant layers + spout fitment, puncture-resistant outer | Leaks in transit; cap-seal failures in dropping tests |
| Light-sensitive (spices, vitamins) | Foil or metalized opaque layers | Color fade and nutrient loss invisible until the customer complains |
| Frozen goods | Low-temperature sealant films, puncture-resistant layers | Film cracks at freezer temps; seam splits on thaw cycles |
Printing Process: The Decision That Sets Your MOQ and Cost
Here is the layer almost nobody budgets for at design time, and the one that most often decides whether a small brand’s packaging gets made at all. The printing process sets your minimum order, your unit cost curve, your color count, and your revision cost, which makes it a design decision in its own right.
Three routes exist. Rotogravure engraves one cylinder per color and rewards long, stable runs with a low unit cost after the setup investment is absorbed. Flexographic printing uses plates and often fits repeat medium-to-large runs. Digital printing removes plates and cylinders, so it is better suited to short runs, frequent artwork changes, and several SKUs that do not need equal quantities.
The route should be quoted against two numbers you already know: the quantity per SKU and the total number of designs. A single high-volume SKU may justify analog tooling, while a mixed launch with many flavors can cost less overall on digital even when its unit price is higher. Tooling, obsolete inventory, proofing time, and freight all belong in the comparison—not only the price per pouch.
Print Routes Compared
| Route | Plate/Cylinder Fee | Typical MOQ | Colors | Unit Cost at Volume |
|---|---|---|---|---|
| Digital (Indigo-class) | None | Short runs; Baishen starts from 500 pieces per SKU | Defined by the press color system and achievable gamut | Competitive when quantities are low or SKUs are numerous |
| Flexographic | Plate fee for each design and color separation | Usually medium-to-large runs; confirm with the converter | Defined by press stations and separations | Declines as repeat volume absorbs setup |
| Rotogravure | Engraved cylinders for the artwork separations | Usually long runs; confirm the crossover in the quote | Defined by press stations and cylinder set | Lowest at sufficiently high, stable volume |
The crossover logic is straightforward. Small batches and multi-SKU catalogs belong on digital. There is no cylinder to amortize, and split-run printing lets one artwork family cover several SKUs in different quantities within a single order. Large single-SKU runs belong on gravure, where the per-unit savings finally outrun the setup costs. Under roughly the low thousands of units, gravure setup fees distort the whole project budget.
The real threshold for small-batch custom pouches
500pieces per SKU
Baishen’s digital route starts here without plate or cylinder fees.
The industry’s center of gravity is moving in the same direction. Smithers values the global digital packaging and label market at $22.0 billion in 2025, or 4.1% of printed packaging, and forecasts $36.9 billion by 2030. The implication for a buyer is not that digital always wins; it is that short-run and versioned packaging now deserve a separate quote instead of being forced into long-run economics.
Choosing a Packaging Partner
Once design and route are decided, the remaining risk is execution, and execution is a supplier problem. Four screening steps keep it manageable.
Send us your product, shelf-life target, pouch size, SKU count, and quantity. We will recommend a structure and print route, then state the sampling, quality checks, and lead time in the quote.
Review My Packaging BriefFirst, verify credentials before you evaluate materials. Ask for two papers: a food-contact declaration for the exact materials in your structure, and quality certificates such as BRC, SGS, or ISO. Then count their quality checkpoints. Raw material checks, in-process checks, and finished-goods checks should all exist, and the supplier should name them.
Second, hand over production-grade files. That means print-ready artwork in CMYK, the dieline the converter specifies, and Pantone references for any brand-critical color. A supplier who accepts a screenshot without comment is a warning, not a convenience.
Third, proof in two stages: a digital proof for layout and content, then a physical sample before mass production. Ask whether the sample uses stock material or your final structure and artwork, because each answers a different question. If a supplier cannot explain its sample process and approval boundary, test the project elsewhere.
Fourth, lock the operating terms in writing: production lead time, shipping method, inspection points, tolerances, how nonconforming goods are handled, and who approves changes. A vague promise is difficult to enforce; named deliverables and dates make the project manageable.
The four-step supplier screen
Verify credentials
Food-contact declaration, BRC / SGS / ISO, named raw, in-process, and finished-goods checkpoints.
Send production files
CMYK print-ready artwork, the converter’s dieline, Pantone refs for brand colors.
Proof in two stages
Digital proof for layout, then a printed sample of your actual bag.
Lock terms in writing
Lead time, shipping, tolerances, inspection points, and remedy for nonconforming goods.
Where Food Packaging Designs Go Wrong
Most packaging failures trace back to four mistakes, and all four are checkable before money is spent.
Mistake one is artwork that is not production-ready: RGB files, low-resolution images, or missing bleed. Before handoff, confirm files are CMYK at print resolution with the converter’s bleed and dieline specs, not a screen-resolution export. Mistake two is a barrier mismatch: the wrong structure for the food’s failure mode, as covered in the matrix above. Match your product to one row of that matrix and get the supplier’s structure recommendation in writing. Mistake three is color surprise: screens emit light, inks reflect it, and brand colors drift. Ask which colors will be matched as spot colors and request a printed sample before the full run. Mistake four is compliance discovered late: food-contact declarations or child-resistant features needed for a category but requested only after production. Name your product category and sales regions in the first inquiry and ask what compliance documentation comes with the quote.
Pre-Production Self-Check
Files are CMYK, print-resolution, converter’s dieline, bleed included
Structure matched to the product’s failure mode and confirmed in writing
Spot colors and Pantone references agreed; printed sample approved
Food-contact declaration and category compliance confirmed for every sales region
Lead time, inspection points, and after-sales response times stated in the quote
The Business Read: Design Decisions as Cost Decisions
The Order of Operations Is a Cost Item
Run the account backward through everything above. A brand that finalizes visuals first and asks process questions later routinely discovers a mismatch. The artwork assumed a cylinder-free world of twelve SKUs and gradient-heavy color, and then meets a 5,000-unit minimum with per-color engraving fees attached. The redesign, the reproofing, and the delay are all costs incurred by sequencing, not by quality. Every layer here is cheaper to decide before the layer above it is locked. Format before artwork details. Structure before format claims. Process before structure promises. Supplier before all of the above.
The Quantity × SKU Grid Picks Your Route
Place your project on two axes, order quantity and SKU count, and the route mostly picks itself. Small quantity, many SKUs: digital is the only route that pencils out, because there is nothing to amortize and split runs consolidate freight and tooling. Large quantity, single SKU: gravure’s unit-cost curve finally pays for its cylinders. The middle ground is smaller than most brands assume. Digital is growing at double-digit rates off a small base, and that trend keeps moving the crossover point in digital’s favor. The strategic summary for a food brand owner: the barrier structure protects the product, but the process choice protects the budget. Deciding them in that order of importance, and in reverse order of sequence, is what turns packaging design from an art project into a margin decision.
At Baishen Pack, we can take a food pouch from product requirements to structure recommendation, artwork review, proofing, printing, lamination, and bag making. Our digital printing capabilities support orders from 500 pieces per SKU without plate or cylinder fees, which helps brands launch several flavors or sizes without overbuying every design. When a long single-SKU run is better suited to gravure, we can compare the routes around the same specification.
Turn Your Food Packaging Design Into a Production Spec
Have artwork already, or only a product brief? Send it to us and we will help match the pouch, material structure, and print route to your launch.
Discuss Your Food PouchReferences
- European Union. “Regulation (EC) No 1935/2004 on materials and articles intended to come into contact with food.” 2004.
- U.S. Government, eCFR. “21 CFR Part 174—Indirect Food Additives: General.” Current.
- Smithers. “The Future of Digital Print for Packaging to 2030.” 2025.